Ignition!
It's looking good for the future. Ted and Andrew started 739 for the first time last Wednesday in two years and it fired up in under 10 seconds! This gave just enough time to determine next steps: need two new radiator hoses and at least one valve in the air system.
Friday, April 20, 2012
Saturday, February 18, 2012
Light and Smoke
One restoration job you can do at home while the Minnesota winter encourages you to stay inside is the light and smoke vent covers above every set of two seats. The units have two glass lenses that focus the light to its passenger and two smoke vents with sliding covers to increase the intake of surrounding air. Each unit is held to the rack by two screws. When removed, they will typically show their 50+ years of wear.


There will usually be multiple layers of paint from the various interior rebuilds done by Greyhound and by later owners. In this example you can see at least three former paint jobs. Note the encouragment to 'Please Open When Smoking.' The glass lenses are, of course, in the middle, and the heads of the two screws holding this evacuator unit in place are visible next to the lights. The two holes are for the single throw toggle switches still up in the parcel rack space with the bulbs themselves. And the small rectangular openings at either end are where the smoke is pulled in when the slider lever (which protrudes from the square hole in the middle) is opened.
A look at the back will reveal what needs to be restored and what the tasks might be.

You will typically see rust, dirt, bug parts and a variety of historical miscellanea that need to be cleaned out. There is a felt or maybe horsehair-type seal that surrounds the light lens sub-assembly and that will need replacement.

When the lens sub-assembly is removed (the two screws and washers at either end), the unit can be removed from the cover. The two glass lenses are held in by 3 metal brackets with a screw and washer for each, assuming parts haven't been lost in the past as in this case (one missing bracket).
The lenses can be easily cleaned with Windex, but if missing or chipped/cracked, you'd only be able to hope to find a replacement from someone who had removed these units from an RV Scenicruiser conversion.
The brackets can be brushed to remove the corrosion, as can the screws and washers, although the latter can be replaced as well. Note that the entire lens housing is surrounded by what appears to be a paper seal which will typically need replacement. I may use plumber's tape unless I find something more suitable.

In the photo above, you can see the remnants of the paper seal which surrounds the lens sub-assembly. The entire metal surface will be cleaned but not painted since there is no need to do so and it preserves the part numbers and the helpful notation: Outboard Left Front. The black rectangular seal I will probably replace with adhesive-backed felt or something comparable. Both seals were undoubtedly designed to keep out smoke and keep in the light.
Sunday, November 6, 2011
Signage
A Scenicruiser also has a lot of signs inside to read. I'm not sure which came when it was originally made in 1956 and what has been added before its last years in Greyhound service and whatever came later. Here's what I've found so far:


Saturday, October 29, 2011
Pull-Cord Switches and Holders
The Scenicruiser certainly has a lot of parts. Four of them are called the pull-cord switches. They are brushed aluminum-covered boxes with a rod and loop to which the pull-cord is attached. Those switches are at the front end just below each of the four luggage racks on the side wall. The cords themselves then snake back to the end of the lower level and to the upper level, running though 9 (upper deck) cord holders screwed to the wall.
When the chime switch to the left of the driver is on, pulling one of the cords activates the pull-cord switch and the chime sounds, letting the driver know a passenger wishes to disembark.
The covers pop off, so do not pry between the box and the wall to which it is mounted. Instead, pry carefully by the detent/hole and it will come off.
Of course, be prepared for the accretions of 50+ years, including spider webs and various bug parts.
To remove the switch, two screws holding down the wires must come off first. Then there are two screws holding the switch base to the wall.
Typically, you won't have the cord attached to the loop coming out of the switch since those are usually long gone. If you pull on the loop, you'll see it's held by a very strong return spring. It's surprising how hard you have to pull to watch the hub contact touch the metal connector to close the circuit.
The cord goes to the back of that side of the deck through cord loops. Here's a look at one of them after removal. These might have been chrome plated, but it's a bit hard to tell. Not sure how I'll clean them up yet.
Removing all the cord loops wasn't too bad, but some of those screws are locked in very tightly. However, with a long phillips screwdriver for leverage, I was able to crack and remove each one.
Of course, over the years, when a cord holder came loose or off, folks would use whatever was handy to make the repair:
Before you know it, you've got them all. Now it's time to figure out how to make them look good again.
When the chime switch to the left of the driver is on, pulling one of the cords activates the pull-cord switch and the chime sounds, letting the driver know a passenger wishes to disembark.
 |
| Pull-cord Switch |
 |
| Pry Cover, Not Switch |
Of course, be prepared for the accretions of 50+ years, including spider webs and various bug parts.
 |
| Switch with Cover Removed |
To remove the switch, two screws holding down the wires must come off first. Then there are two screws holding the switch base to the wall.
 |
| Switch Removed |
Typically, you won't have the cord attached to the loop coming out of the switch since those are usually long gone. If you pull on the loop, you'll see it's held by a very strong return spring. It's surprising how hard you have to pull to watch the hub contact touch the metal connector to close the circuit.
The cord goes to the back of that side of the deck through cord loops. Here's a look at one of them after removal. These might have been chrome plated, but it's a bit hard to tell. Not sure how I'll clean them up yet.
 |
| Cord Loop |
Removing all the cord loops wasn't too bad, but some of those screws are locked in very tightly. However, with a long phillips screwdriver for leverage, I was able to crack and remove each one.
 |
| Leverage Needed |
Of course, over the years, when a cord holder came loose or off, folks would use whatever was handy to make the repair:
 |
| Multiple Fasteners |
 |
| All Nine From One Side Upper Deck |
Sunday, October 23, 2011
External Lights - The Markers
Unlike the rear, the front Michigan markers are intact, though whether or not they work remains to be seen.

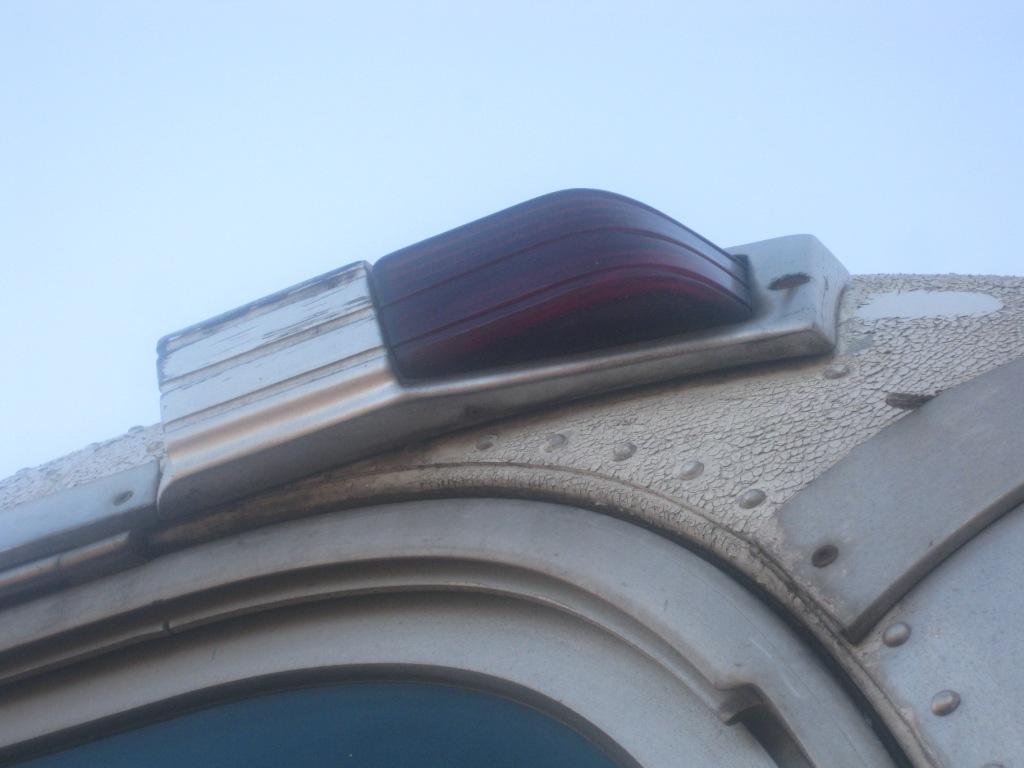
And, all four corner markers appear to be original and in good shape:

 |
| Left Front Corner Marker |
 |
| Right Front Corner Marker |
 |
| Left Rear Corner Marker |
 |
| Right Rear Corner Marker |
External Lights - Front
Perhaps from its foggy past in the San Francisco area, #739 ended up with two sets of fog lights. I would presume authenticity means the ones on the bottom will go. For some reason, the 'originals' inside the bumper are not both amber which I would expect.


Because of the dull luster of the rings around the headlights, I suspected they were aluminum and not chrome. However, looking at a closeup of the right headlight shows a crack with rust. That suggests it's not aluminum, but a chrome plating over steel (?) that has lost its luster.
The reflectors look good and maybe original. I can't read all of the text around the perimeter of the reflector housing, but I can read New York and Toronto.
The turn signals look very good. The rings are still shiny and appear to be chrome. The glass is good and where will you ever see a bright red caboose reflected in the lens, besides the Minnesota Tranportation Museum!


External Lights - Rear
Another sunny fall day and time to take inventory of the external lights for future replacement. First was a look at the rear tail/brake/marker lights. As you can see, creative ways to attach were used on the left set. Neither had the original blocks in which the tailights were mounted and I didn't look close enough to note whether the rings were chrome (original) or aluminum. What do you think? One more thing to check next time - are they the original glass lens and bulb or a newer sealed beam? (thanks Tom!)


The rear reflector blocks seem to be original and intact, although the left ring has a piece missing:


And finally, the rear Michigan markers - unfortunately, gone!

I'm not sure where I can find one of those!
Subscribe to:
Posts (Atom)