Monday, October 8, 2012

Lock 'er up....

After a break-in a couple of weeks ago, the schedule to fasten the remaining window latches got a bit more urgent. Two had come off or had stripped screws. Once drilled out, they had to be tapped:


Of course, you always want to make sure everything works before attaching the latch:


Then, the latch, of course:


Of course, sometimes the latch needs to have some work. No time to dismantle, so a soak in PB Blaster was in order:

 
That freed up the latching mechanism so it could be installed and the window shut securely:
 
 
Onwards!

Friday, September 14, 2012

A Little More OEM Today

 
Part of the restoration plan is to remove items added after the Greyhound years. Today a few of those happened, as well as more progress on the side windows and getting them to open outwards like they used to.

As usual, every tool possible was needed, except a screwdriver which was the original installation mechanism. A 5/16" wrench with hammer on some of the screws, a vice grip and even a chisel were all necessary, not to mention the usual PB Blaster.

Before
 
There was an antenna at each corner, as well as another above the driver's window. For now, tape covers the holes until I hear what's best for plugging them, something that will sand smoothly for the paint later.
 
After

The left side already has the amber marker off for refurbishing.

Left side with two antennas removed
 
One additional removal was the extra set of fog lights below the front bumber. Five non-OEM pieces now gone.
 
 
Two fog lamps, three antennas and hardware


To get some more of the windows opened, it took PB Blaster at each of the three latches per window and a rubber mallet before and after to shake things up a bit - carefully! I'd alternate between prepping a window, letting it soak while I worked on another antenna screw, then back to open the window. They all did! Only the last two on both sides of the upper deck remain, because of tables or benches in place that prevent the latch bar from pulling out and up. So much for emergency escape windows!

Right side open ....
 
 
Fresh air at last...

Some of the windows, once freed for the first time in decades, would not close again. That's because the rubber seals, now hard as rocks, would hang down at the bottom of the window and, of course, that blocked the window from closing. I ended up rolling sticky tape in the slots, then pushing the hard seal pieces back up to get them shut. New seals are in the plan!

What a great three hours!! Slowly but surely we push on ....


Friday, August 17, 2012

Lavatory Relays and Limit Switch Panel

Say what? Yes, that's what it's called. And if you've ever noticed on the restroom wall, between the sink and lavatory, there is a panel that perhaps you haven't investigated.


A few screws out and this is what you'll see:


If you have one of the first two hundred coaches, the one relay (black/rusted boxes) on the left was originally used to control the lavatory light and 'Occupied' sign.The relay on the right, triggered by closing the restroom door, ran the high speed blower by bypassing the resistor in the circuit. But after 20% of the order was built, the engineers and management decide they needed to run the low speed blower continuously through this relay instead. The earlier coaches may have been retrofitted with the new circuitry.

The round device is the water pump limit switch. This was a clever component wired in series to the water pump motor. When the water pump switch was pressed (no faucets here!), this rotary switch gave about 15 seconds of water, then shut off. It would then take about 18 seconds for the probably bi-metal element to cool and the pump could operate again. This helped conserve water and prevent overflows.


The two relays were part of the circuits to run either the low speed blower continuously or the high speed blower when the door was latched. As the maintenance manual put it delicately: "Ventilator blower ... forces objectionable odors from the lavatory compartment to outside of coach."


These relays are identical Delco-Remy 1116852s. Prying off the metal cap carefully reveals the coil, points and terminals. A bit of wire wheel work on both cap and terminal produces the intended results:


Next comes the cleaning of the points and some adjustments, before painting the cover with gloss black paint. Then back to the second relay, then take a look at the limit switch. Not sure what to do with it besides leave it alone!


Specs for the 1116852 are these:

 
Make                                                         Delco-Remy
Air Gap (with points closed)                    0.022"
Point Opening                                            0.030"
Closing Voltage                                         7.0 Min.
Sealing Voltage                                          9.0 Max.


After a couple of light coats of gloss black enamel, it's looking pretty good, especially for a first effort.


More later!

Friday, June 22, 2012

Mirror Screws

For me, the toughest part of restoration is removing stripped or 'headless' screws/bolts from various components. Since this inevitably happens with 60-year old coaches sitting in decades-worth of rain, snow, heat and everything else, fastener restoration is going to have to be a core competency.

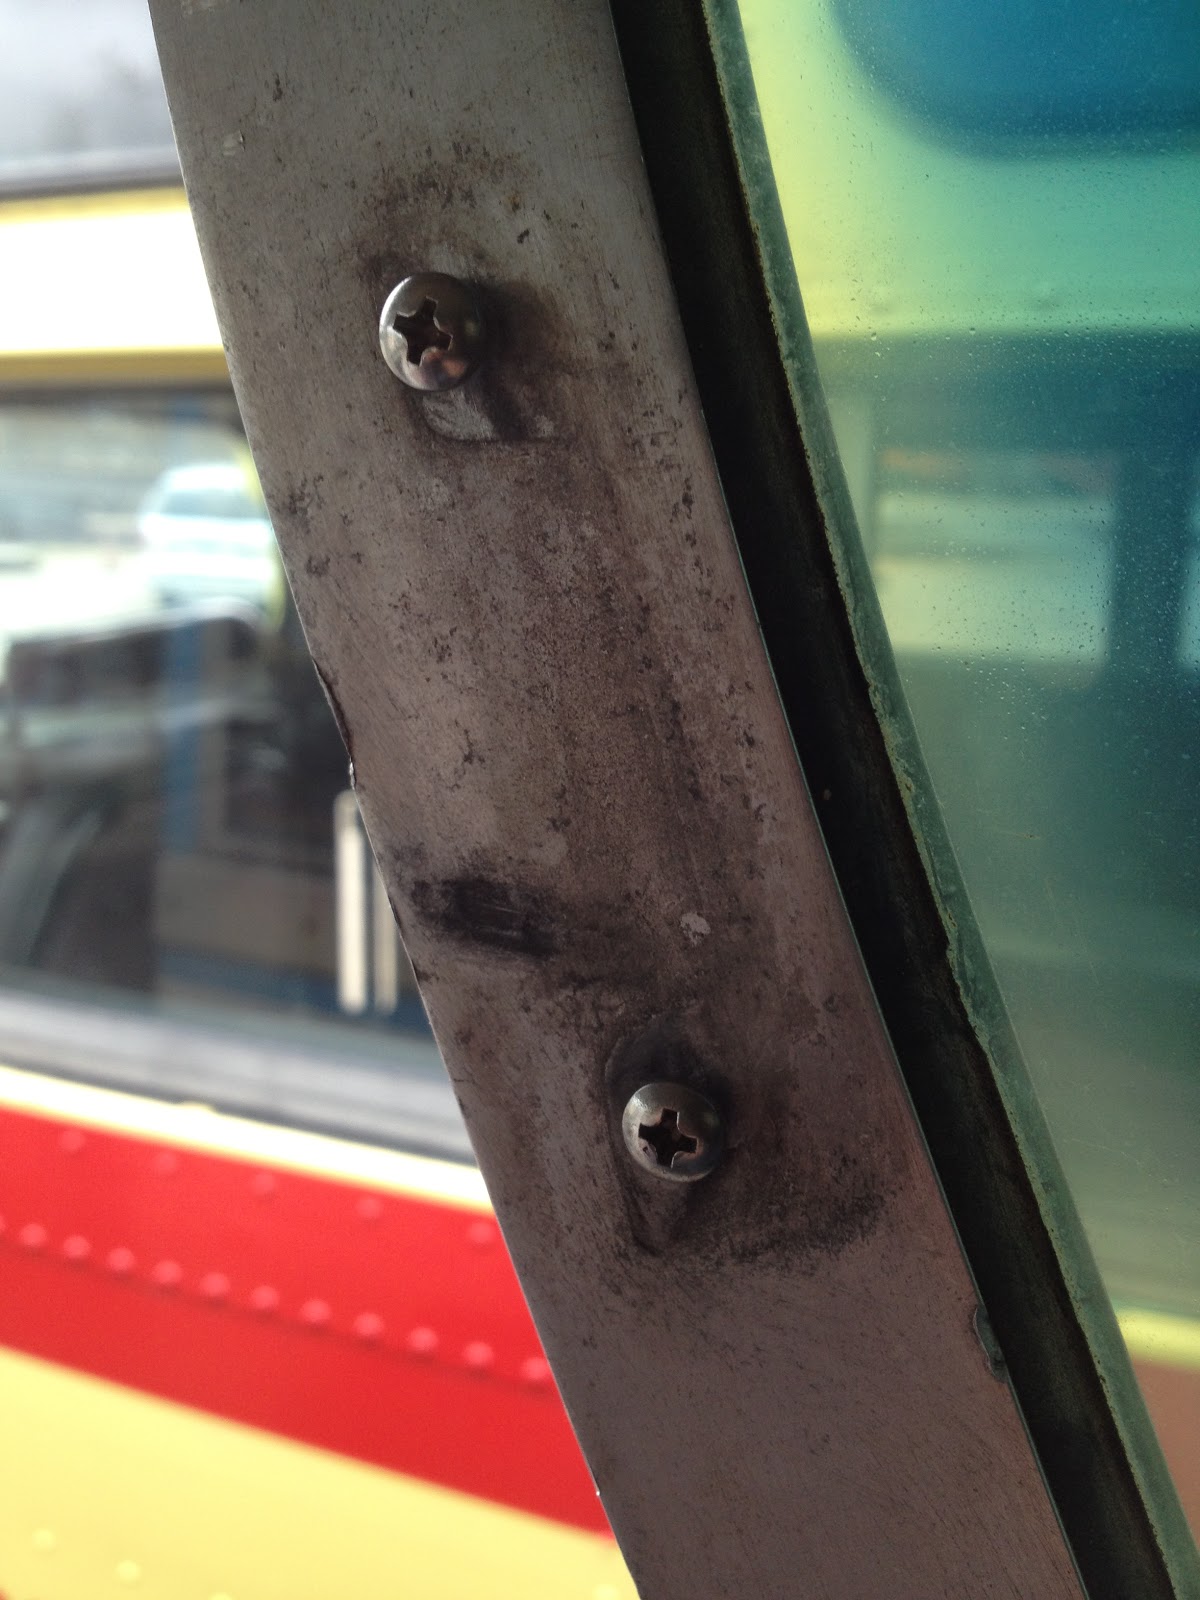
Take the side-view mirrors as an example. The main aluminum housing has a recessed ledge or seat around the sides on which the mirror sits, originally protected by cork tape padding to avoid glass-on-metal. Over the perimeter of the mirror fits a rectangular aluminum bezel about 3/4" wide through which 8 oval-headed Phillips screws hold it down and are tightened into threaded holes in the main housing.


In the one above, while two screws came out the normal way, six did not. Some of those heads were gone and those with heads, I drilled a hole down the middle, as best I could. Below is one of them; while some may unerringly drill exactly down the middle, I'm not there yet.


Some or all of the remaining screw heads in the bezel can be twisted out with a screwdriver since there's typically not much left holding it on.


Once every hole with something in it is drilled, using a cobalt bit marked with masking tape to the thickness of the bezel to avoid going too deep, the bezel still just doesn't pop off. Unless you can drill out exactly every piece of the former fastener, that won't happen. But if you can find an opening between the bezel and the body, you're in luck.


By very carefully tapping the screwdriver in either direction, the now-weakened fasteners will eventually give way. You'll have to do this around the perimeter and eventually the bezel will pop off.


 Then the mirror can be carefully pried up from the housing. In this one, there was a white putty-like substance under the mirror perimeter, cushioning it from direct metal contact and also holding it in place.


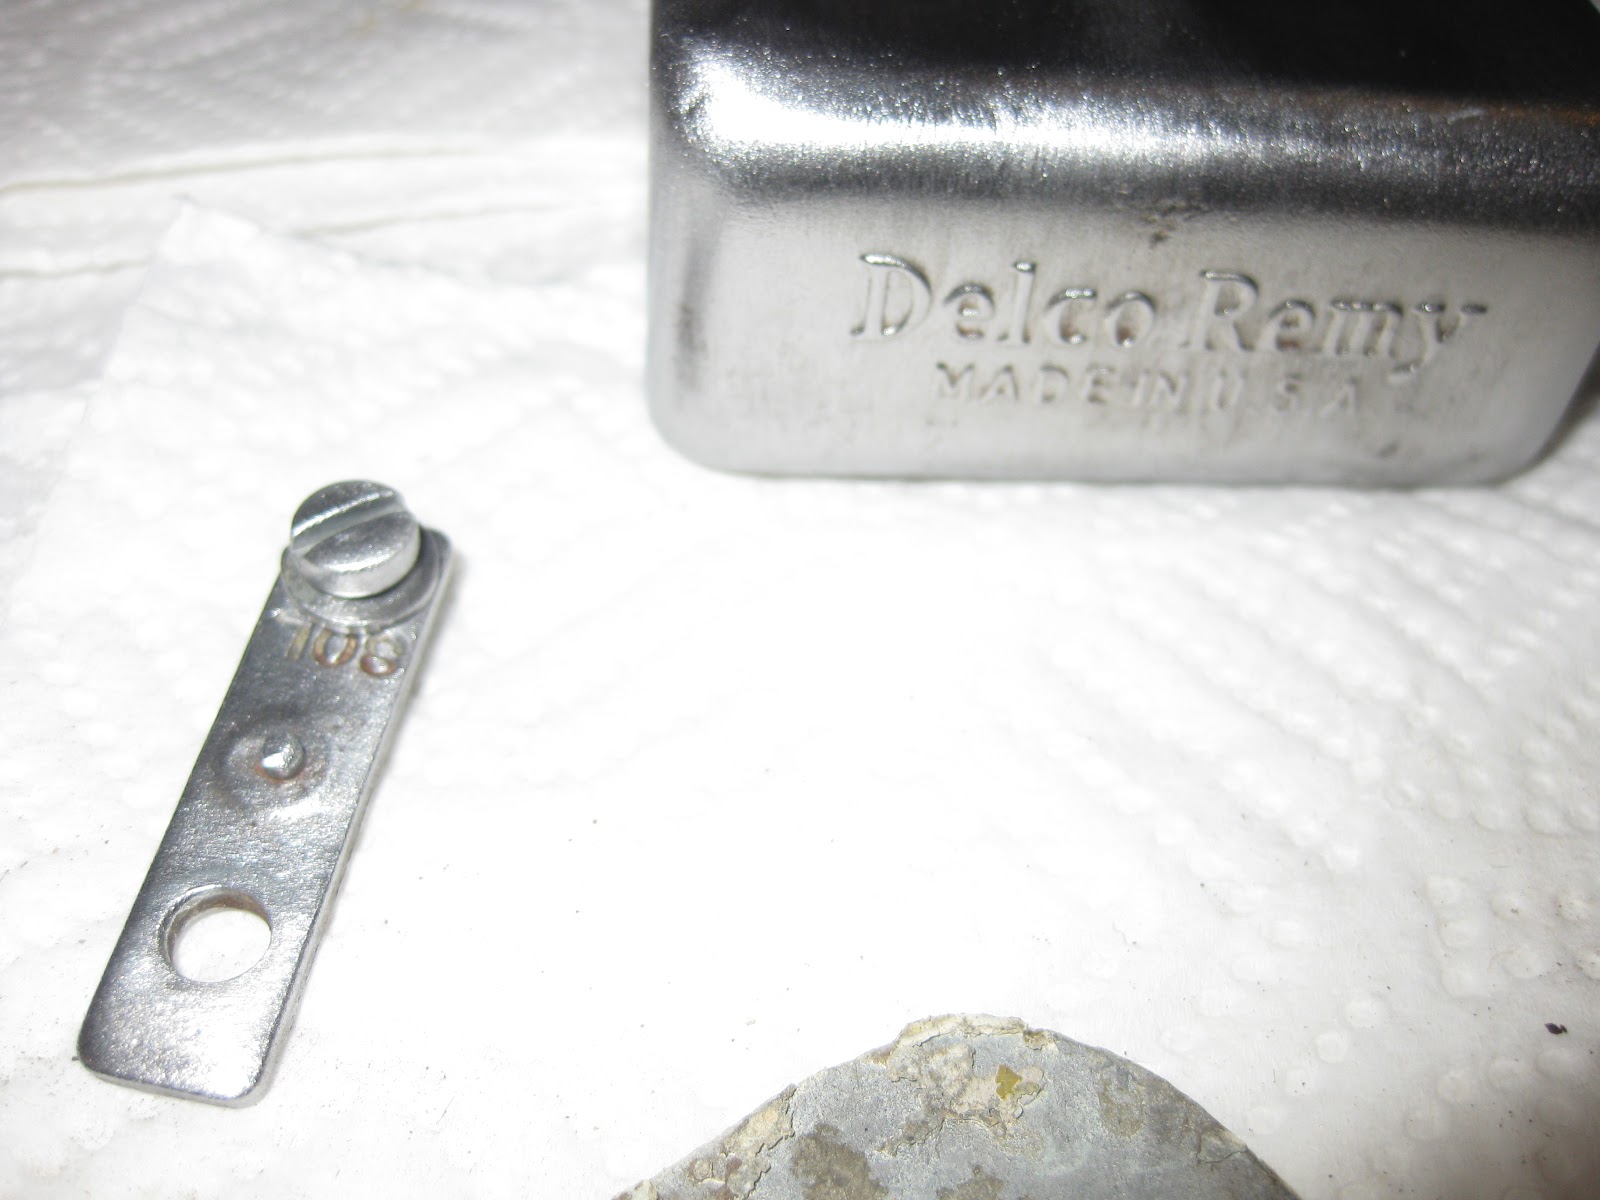
After cleaning up the housing comes the fun part. Unless you manage to drill out the entire body of the screw, you will have 'castings' from the remaining screw bodies like the one below.


These, of course, have to be removed and that's done nicely with a Dremel tool and cutting disk.


Grinding at the base of the 'casting,' it doesn't take long to get it off and relatively flush. This one is about ready to come off.


Here's where you see how close you got when drilling out the screw to the bulk of it in the threaded portion of the housing. I didn't do too well on this one - about a 50/50 gap.


You don't want to just keep drilling the hole to the proper depth in the aluminum. First, the bezel screw holes won't line up. Plus, you don't want to remove any more of the original material in the housing if you don't have to.

Using a cobalt bit in one of the good holes, you can determine how far the bit should go in when drilling out the others. A piece of tape on the bit will show you when to stop.


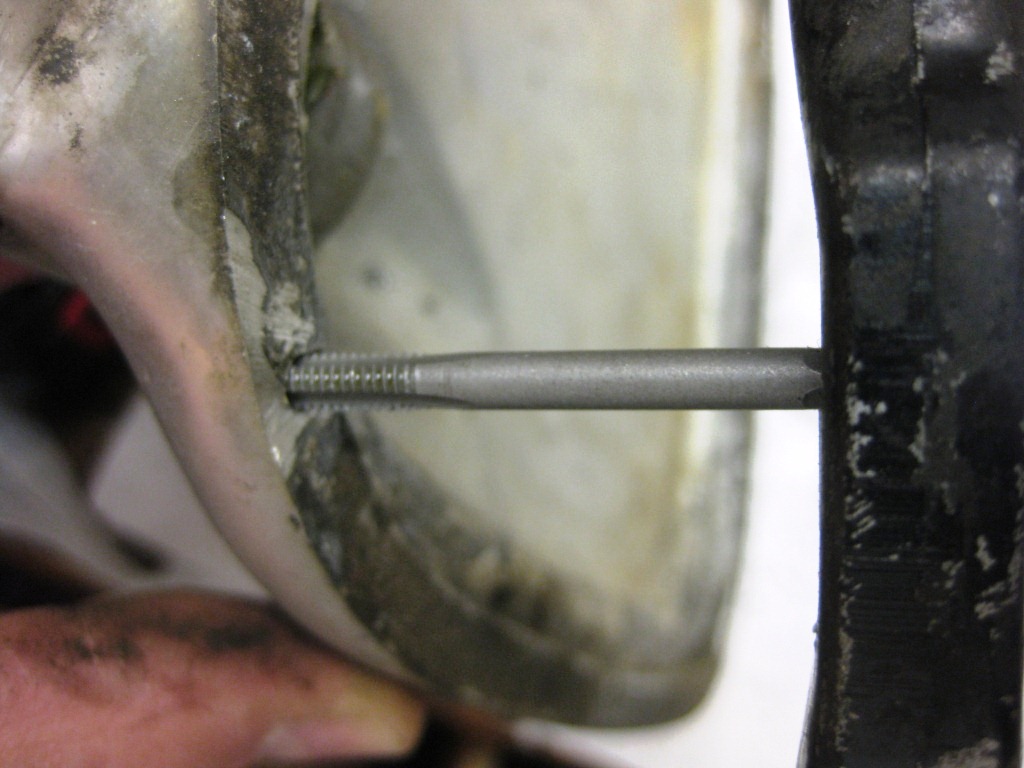
Using the small hole in the aluminum as the staring point, I drill slowly at a 45-degree angle into the remaining faster body, rotating the drill to straight up and down when it's in the screw metal. You end up with something like this.


Carefully threading the new hole with an 8-32 tap, you end up almost as good as new.


Friday, June 8, 2012

New Mirrors!

Kudos to Jeff and White Bear Glass. He's done a beautiful job of creating replacement side-view and interior mirrors for #739. And since they don't have chamfer machines any more, it was done by hand! These are absolutely beautiful!

Original and New Driver's Interior Mirror

Original and Hand-chamfered Edges

Two new (and original) side mirrors

New side mirror edge

Need mirrors or glass? Check out White Bear Glass and thank you Jeff!

Sunday, June 3, 2012

Michigan Markers - Rear

Picked up the rear Michigan Marker unit today that John dropped off. The front and back of every Scenicruiser, if not every coach of that era, had a three-light unit at the top of the coach in the middle. Presumably these regulations first made an appearance in Michigan, but the origins of that name are unclear.

As you can see, some work is needed. Should this aluminum be polished and shiny? Also, two of the red lenses are missing, but John thinks he has them at home.


The trick will be to get the 3rd glass lens off the aluminum mounting without breaking it. I can already tell the two screws are locked and will strip. They're soaking in PB Blaster, but I'm not hopeful; there's not much Philips thread left on them. Of course, at least one of the other's will need the holes drilled and tapped.

Even more fun awaits refurbishing the sockets. While they should be relatively easy to find, as you can see from the photos, I don't yet have a single clue as to how they mount, how to remove and how to put in new ones.


One last challenge, the wiring diagram clearly shows a hot wire to each of the three bulbs and then to ground, presumably through the aluminum case. But does that mean no gasket material between it and the aluminum roof on which it mounts? And why does the middle socket wire clearly NOT go to the base of the bulb holder but to what looks like ground? Another project ... alright!

Middle Bulb Socket Wiring


Saturday, May 26, 2012

Mirrors

Even though 739 could move without its side-view mirrors, that's just one of many safety components that have to be in place to get on the road. This Friday afternoon the weather was so nice, I had to take a half-day of vacation and spend some time on various projects, including removing the two mirrors for replacement glass.

Each is held on with a hex head cup point set screw. I actually had a wrench that fit! And I had been taught to use plenty of PB Blaster. What could be easier? I started with the driver's side mirror.


After maybe up to 40 years of holding that mirror on tightly, that screw was not about to budge. It  had bonded well over the years and based on the fact that it would not move, I wondered if the parts might have welded together over the many years of sun and weather. So over to the passenger side.


Same story. But I knew to tap with a hammer, use a vice-grips for some leverage, and give that PB Blaster some time to work.


I guess I shouldn't have been surprised, but that passenger side set screw finally moved!


And then too, so did the driver's side!


Then off came the two mirrors, right? Not at all. One didn't budge a bit and the other at least turned a few degrees in either direction. More PB Blaster, more back and forth motion, and eventually, the two mirrors gave up. You can see a bit of clean up is in order before reassembly.


On we go.....